HCI Lab 2 : Roll-A-Ball
Hello everyone !
Today I completed a Unity tutorial to create my first 3D game. You can also do it ! As a beginer myself, I found it very comprehensible and easy to complete. Follow this link !
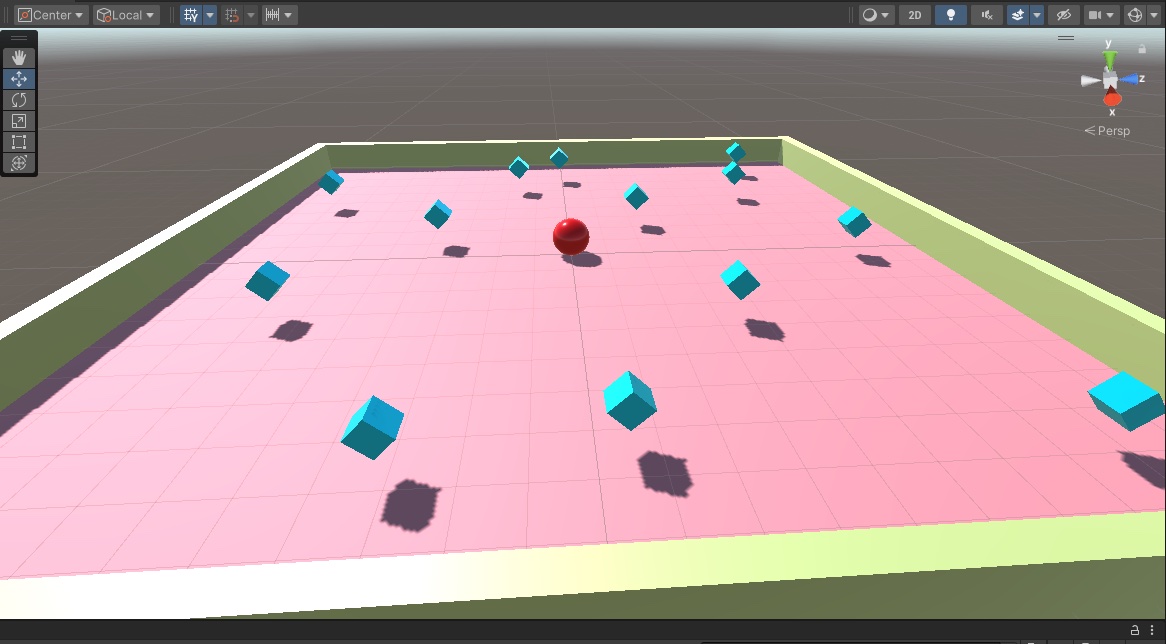
First of all, I invite you all to create the environnement of the game :
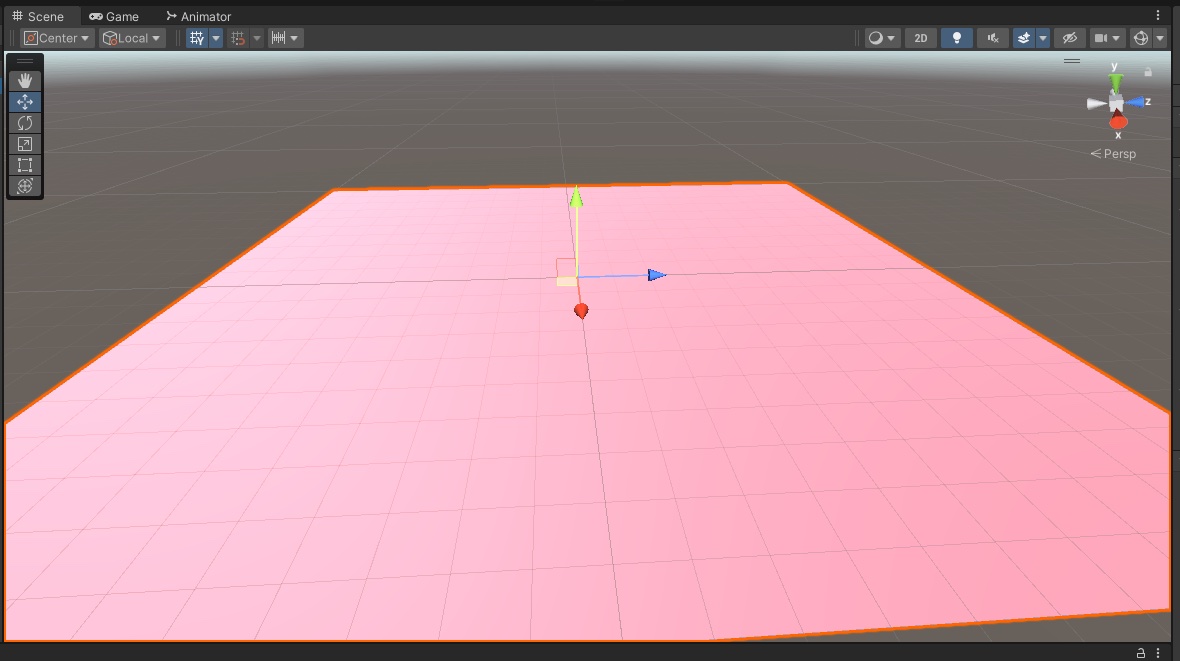
- Create the ground with a 3D object Plane. Set its scale to X=2 Y=2 Z=2. Then in the assets, create a folder Materials where you add the first Material named ground. You can choose the color you want in the inspector and the you drag the material onto the ground in the scene.
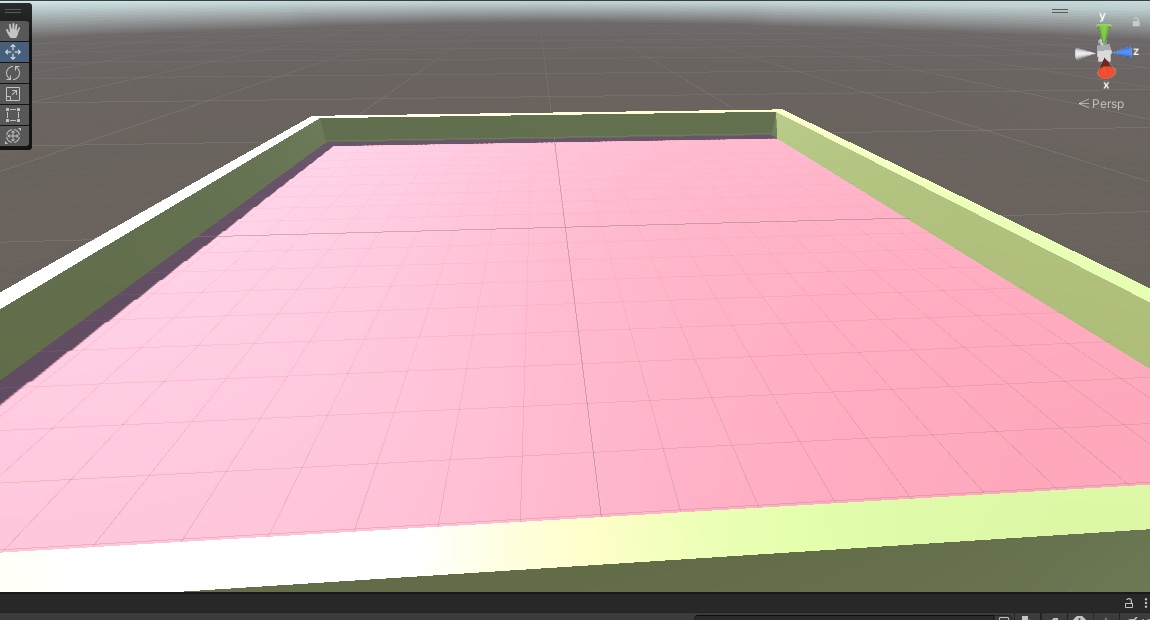
- Now create in the hierarchy an empty object named Walls. Inside it you will put the four walls of the game. To create a wall, add a 3D object Cube and rescale it : X=0.5 Y=2 Z=20.5. Then you just have to duplicate this wall 3 times and place them following these different positions :
X=-10 Y=0 Z=0 X=0 Y=0 Z=10 X=10 Y=0 Z=0 X=0 Y=0 Z=-10
You can also create a nex material with a differnt color in the forlder Materials and dra it onto the walls in the scene or in the hierarchy.
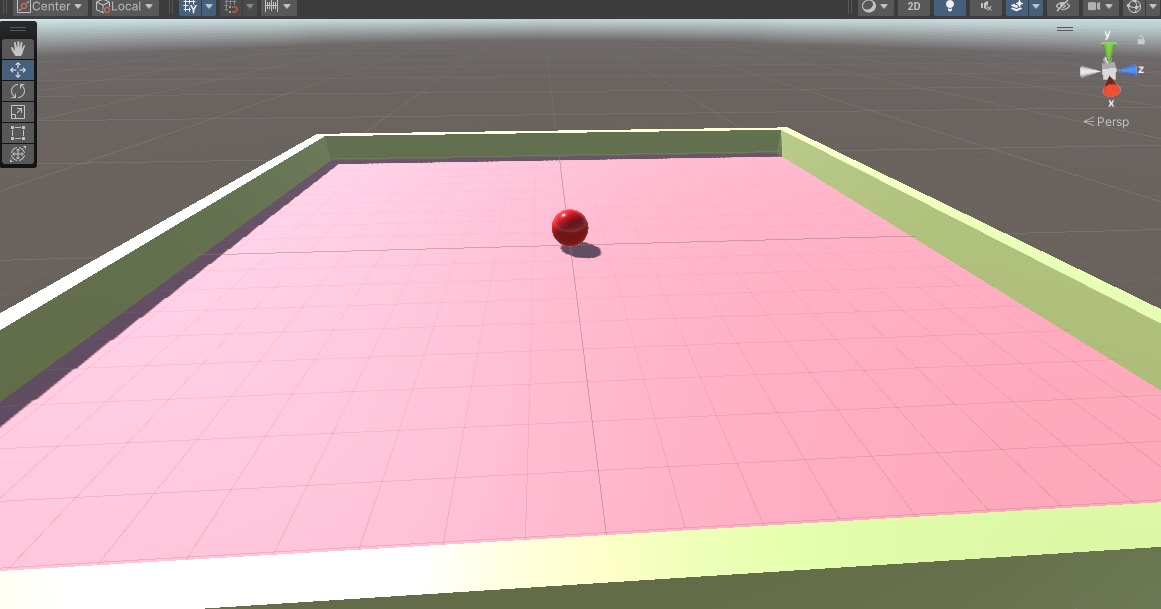
- Then for your player, create a 3D object Sphere and color it the way you want using the same method as before. Add a rigidbody to you player.
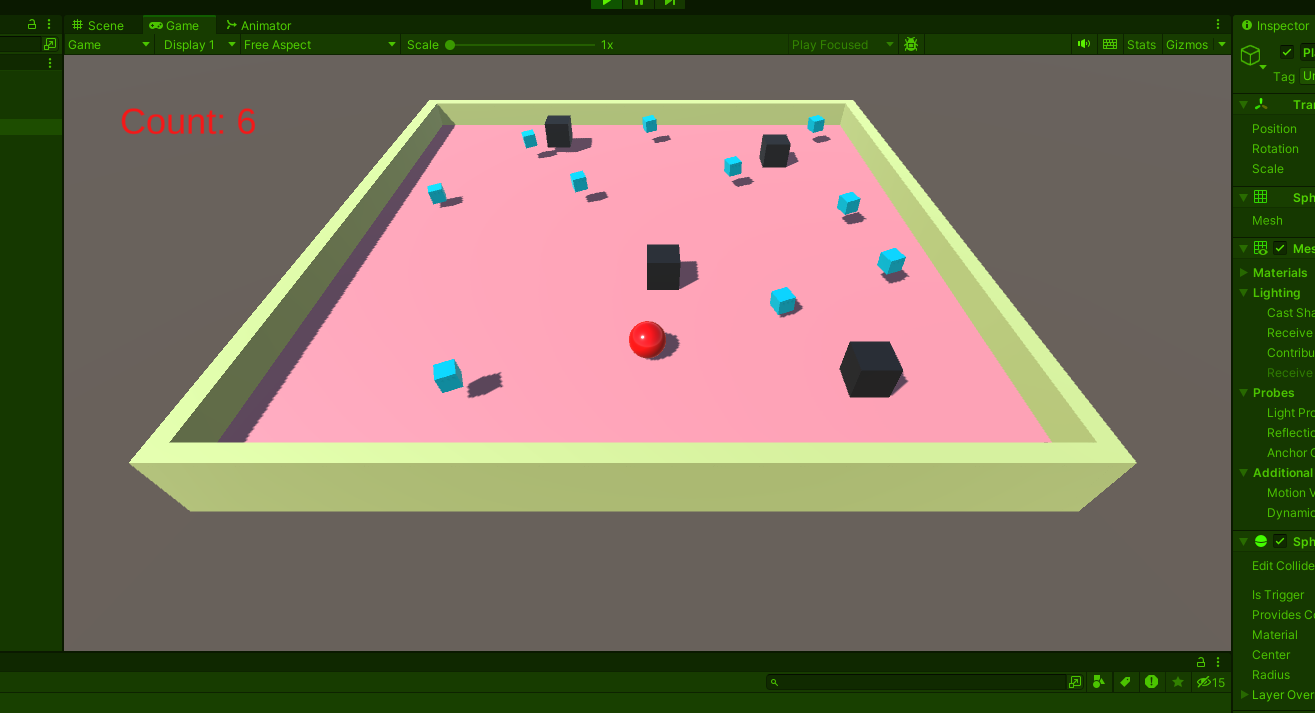
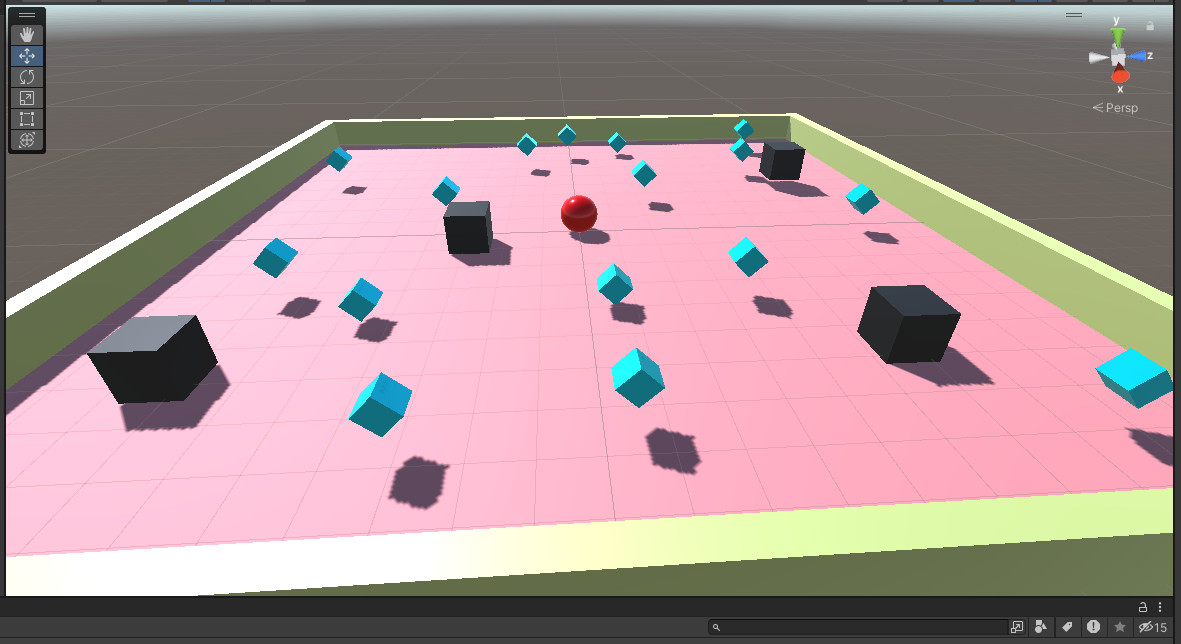
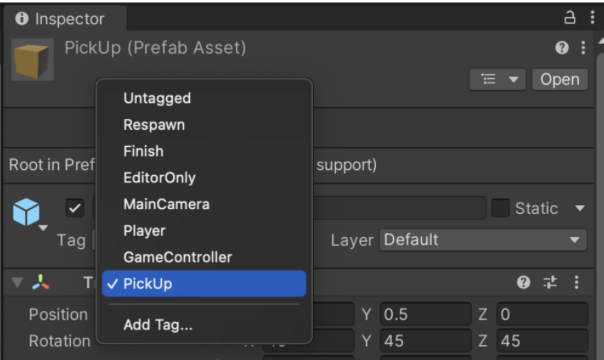
- Finally, you have to create the PickUp objects. For that create an empty object in the hierarchy naled PickUp Parent. Then add a Cube to the scene and rename it PickUp, scale it to X=0.5 Y=0.5 Z=0.5, and color it the way you want with the materials folder. In the assets create a new forlder named Prefabs. You can now drag your PickUp object inside it. Thank to this prefab you can now duplicate the collectibles as many time as you want by dragging it in the scene. Staying on you prefab PickUp, in the inspactor, you have to add a Tag named PickUp and the select it. Select the OnTrigger option in the box controller and add a kinematic Rigidbody (Unselect Use Gravity)
You can repeat the exact same steps to create your ennemies.
Now let’s implement the scripts to interact with our game
Within the Package Manager, import the Input System Package. This action empowers you to incorporate the Player Input module into the ball. This module facilitates the ball’s comprehension of the inputs it will receive, including keystrokes and mouse clicks, ensuring seamless interaction.
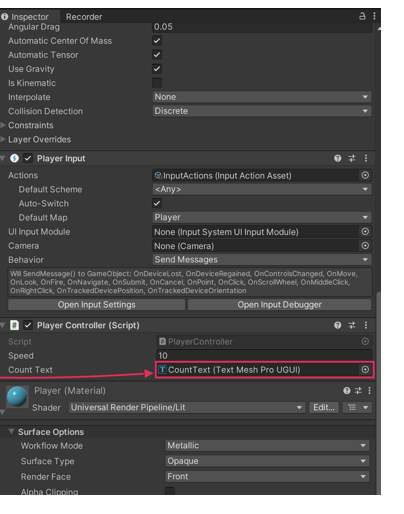
Create a new folder in the assets named Scripts. Select the player, and add a script named PlayerController. Here is the code :
using System.Collections;
using System.Collections.Generic;
using Unity.VisualScripting;
using UnityEngine;
using UnityEngine.InputSystem;
using TMPro;
public class PlayerController : MonoBehaviour
{
// Rigidbody of the player.
private Rigidbody rb;
// Variable to keep track of collected "PickUp" objects.
private int count;
// Movement along X and Y axes.
private float movementX;
private float movementY;
// Speed at which the player moves.
public float speed = 0;
// UI text component to display count of "PickUp" objects collected.
public TextMeshProUGUI countText;
// UI object to display winning text.
public GameObject winTextObject;
// Start is called before the first frame update.
void Start()
{
// Get and store the Rigidbody component attached to the player.
rb = GetComponent<Rigidbody>();
// Initialize count to zero.
count = 0;
// Update the count display.
SetCountText();
// Initially set the win text to be inactive.
winTextObject.SetActive(false);
}
// This function is called when a move input is detected.
void OnMove(InputValue movementValue)
{
// Convert the input value into a Vector2 for movement.
Vector2 movementVector = movementValue.Get<Vector2>();
// Store the X and Y components of the movement.
movementX = movementVector.x;
movementY = movementVector.y;
}
// FixedUpdate is called once per fixed frame-rate frame.
private void FixedUpdate()
{
// Create a 3D movement vector using the X and Y inputs.
Vector3 movement = new Vector3(movementX, 0.0f, movementY);
// Apply force to the Rigidbody to move the player.
rb.AddForce(movement * speed);
}
void OnTriggerEnter(Collider other)
{
// Check if the object the player collided with has the "PickUp" tag.
if (other.gameObject.CompareTag("PickUp"))
{
// Deactivate the collided object (making it disappear).
other.gameObject.SetActive(false);
// Increment the count of "PickUp" objects collected.
count = count + 1;
// Update the count display.
SetCountText();
}
if (other.gameObject.CompareTag("Ennemy"))
{
// Deactivate the collided object (making it disappear).
other.gameObject.SetActive(false);
// Decrement the count of "Ennemy" objects collected.
count = count - 1;
// Update the count display.
SetCountText();
}
}
// Function to update the displayed count of "PickUp" objects collected.
void SetCountText()
{
// Update the count text with the current count.
countText.text = "Count: " + count.ToString();
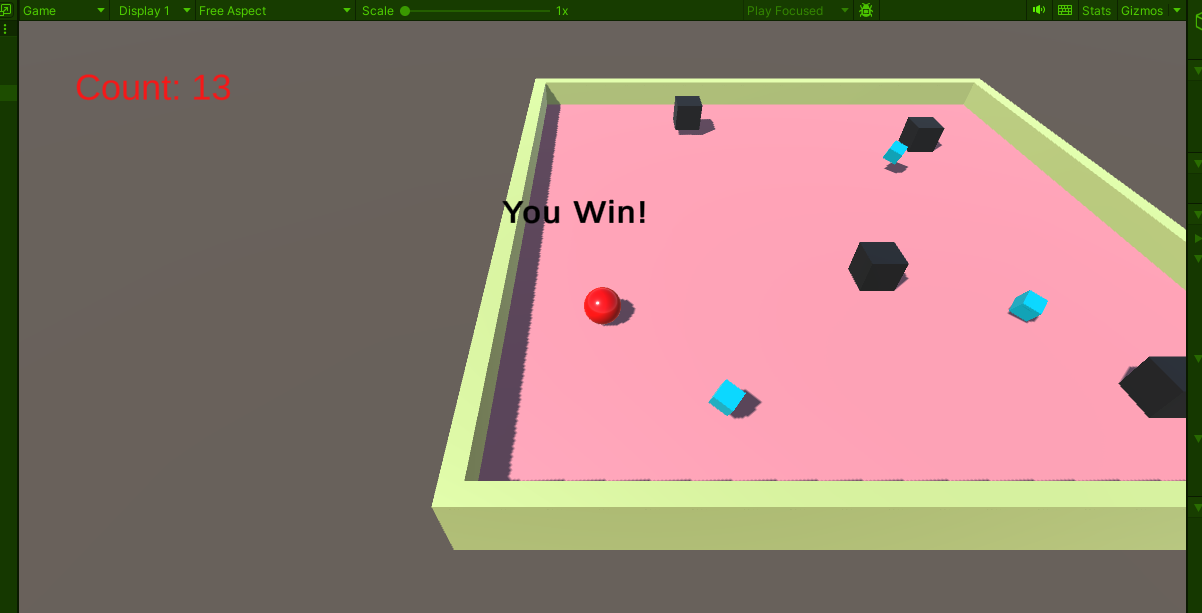
// Check if the count has reached or exceeded the win condition.
if (count >= 13)
{
// Display the win text.
winTextObject.SetActive(true);
}
}
}To follow your player while playing you also have to add a CameraController to your main camera. Don’t forget to drag you player in the inspector under the script CameraController. Here is the script:
using System.Collections;
using System.Collections.Generic;
using UnityEngine;

public class CameraController : MonoBehaviour
{
    // Reference to the player GameObject.
    public GameObject player;

    // The distance between the camera and the player.
    private Vector3 offset;

    // Start is called before the first frame update.
    void Start()
    {
        // Calculate the initial offset between the camera's position and the player's position.
        offset = transform.position - player.transform.position;
    }

    // LateUpdate is called once per frame after all Update functions have been completed.
    void LateUpdate()
    {
        // Maintain the same offset between the camera and player throughout the game.
        transform.position = player.transform.position + offset;
    }
}
To finish our game all left to do is add a Count Text and Win Text.
Now you can add a UI (Text Mesh Pro) in the hierarchy. add a Count text and a win text and place them where you want on the canva.
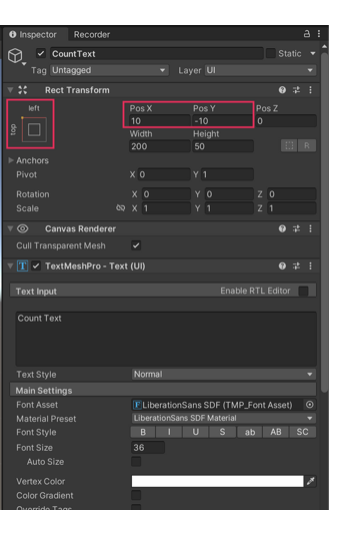
Don’t forget to place the countText and WinText in the script PlayerController